Table of Contents
Chakra UI (opens in a new tab) is a modular and accessible component library that has won the hearts of many developers. I personally really like its progressive disclosure of complexity for the APIs (theming, components, helper functions). Often times you’ll find yourself modifying some theme properties like colors and sticking with the components it ships with. However, you can use component styles (opens in a new tab) to change individual components to your liking. This allows you to change base & default styles but also add new styles to a component and modify properties like size, variant, color scheme, and color mode behavior.
But what if you want to create your own component that fits into the existing project and uses the underlying theming system? No problem, you can also use component styles for that. Even if the component has multiple components to it (multipart). While the component styles API certainly has a learning curve to it, the time learning it will be worth your time. Your components will behave the same as any other component which greatly improves productivity for you (and possibly your team) and ensures consistency in your project.
By the end of this tutorial, you’ll be able to create a multipart component in Chakra UI that is controllable by variant, size, color schemes and respects the color mode. You’ll create a Container component that you can use to display your main content (e.g. an article like this) or full-bleed content. See the live preview (opens in a new tab).
This tutorial assumes that you have used Chakra UI in the past or are familiar with its usage, especially how you use themes and different modifiers like size, variant, etc. I’d suggest following their getting started guide (opens in a new tab) or browsing their resources (opens in a new tab) to learn the basics.
You’ll use Vite (opens in a new tab) to build the demo site but no prior knowledge is necessary.
To get started, create a project with Vite (opens in a new tab) using the react-ts preset. Initialize a project in your preferred directory with:
npm init viteYou’ll be asked three questions:
~ > npm init vite✔ Project name: your-project-name✔ Select a framework: › react✔ Select a variant: › react-tsGo into your-project-name directory and run npm install. To install all necessary Chakra UI packages for this tutorial, run the following:
npm install @chakra-ui/react @chakra-ui/theme-tools @emotion/react@^11 @emotion/styled@^11 framer-motion@^4You’ve successfully set up the boilerplate for this tutorial! In the next steps you’ll also create the baseline for Chakra UI by adding a provider, creating a theme and using one of Chakra UI’s built-in components.
Go into src/main.tsx to wrap the <App /> with the Chakra UI Provider:
import React from "react"import ReactDOM from "react-dom"import { ChakraProvider } from "@chakra-ui/react"import App from "./App"import theme from "./theme"
ReactDOM.render(  <React.StrictMode>    <ChakraProvider theme={theme}>      <App />    </ChakraProvider>  </React.StrictMode>,  document.getElementById("root"))
The theme doesn’t exist yet so create a new file at src/theme.ts. By default, Chakra UI ships with a default theme (opens in a new tab) that you can customize (opens in a new tab). For the purposes of this tutorial you’ll use customized CSS media query breakpoints and define the default CSS prefers-color-scheme to the light variant (+ use the system setting to switch between light and dark mode):
import { extendTheme, ThemeConfig } from "@chakra-ui/react"
const breakpoints = {  sm: "640px",  md: "768px",  lg: "1024px",  xl: "1280px",  "2xl": "1536px",}
const config: ThemeConfig = {  initialColorMode: "light",  useSystemColorMode: true,}
const theme = extendTheme({  breakpoints,  config,})
export default theme
By using extendTheme you only overwrite the properties you define, the rest will be the default theme.
It’s a good idea to split out the properties going into extendTheme if your theme file itself gets to large. Chakra UI documents this process here: Scaling out your project (opens in a new tab).
Before customizing the built-in Container component, you should first use it on the index page to visually see the changes you make. Add a color mode toggle to also test out the two different color modes:
import React from "react"import { Container, useColorMode, Button, Heading, Text, Divider,} from "@chakra-ui/react"
function App() { const { colorMode, toggleColorMode } = useColorMode()
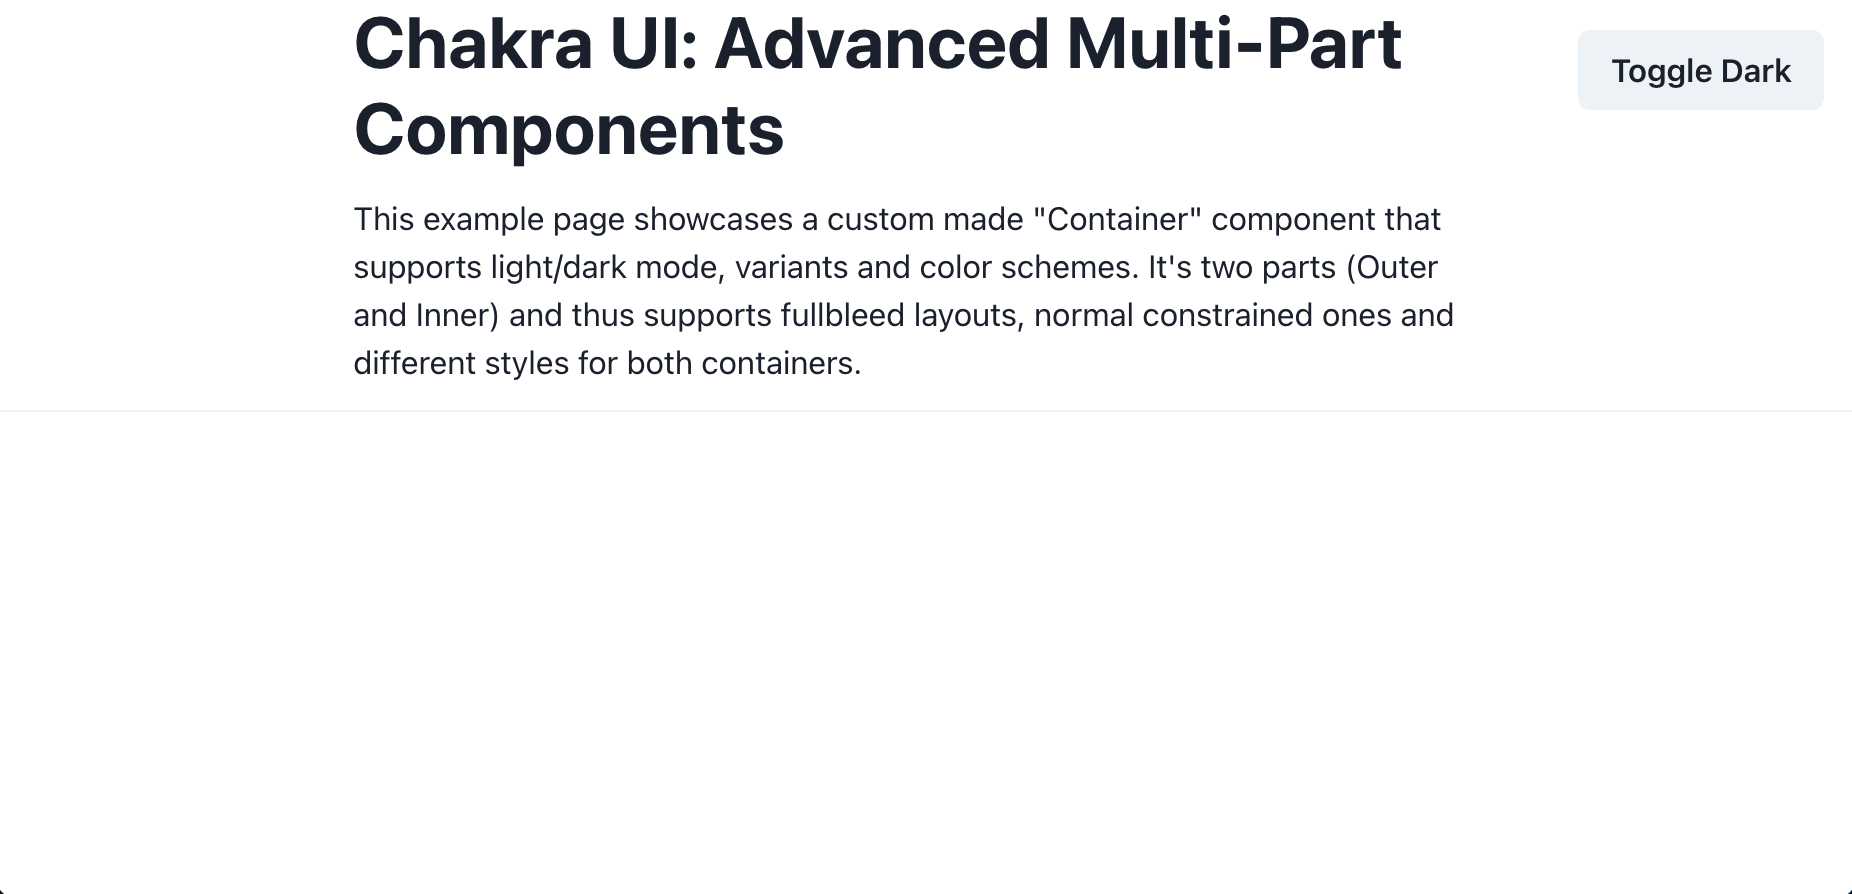
return ( <main> <Button position="fixed" right="1rem" top="1rem" onClick={toggleColorMode} > Toggle {colorMode === "light" ? "Dark" : "Light"} </Button> <Container> <Heading as="h1">Chakra UI: Advanced Multi-Part Components</Heading> <Text sx={{ mt: 3, mb: 3 }}> This example page showcases a custom made "Container" component that supports light/dark mode, variants and color schemes. It's two parts (Outer and Inner) and thus supports full bleed layouts, normal constrained ones and different styles for both containers. </Text> </Container> <Divider /> </main> )}
export default AppStart Vite to see it in action:
npm run devGo to http://localhost:3000 and you should see something like this:
As the MultiContainer should reuse some styles from Container you’ll first need to modify the built-in Container component. Chakra UI has a specific theming API for its component styles (opens in a new tab) that follows this shape:
export default { // Styles for the base style baseStyle: {}, // Styles for the size variations sizes: {}, // Styles for the visual style variations variants: {}, // The default `size` or `variant` values defaultProps: {},}Create a new file at src/chakra/container.ts with the following contents:
import { ComponentStyleConfig } from "@chakra-ui/react"
const Container: ComponentStyleConfig = {  baseStyle: {    w: "100%",    mx: "auto",    maxW: "960px",    px: [4, 6],    py: [8, 10],  },  defaultProps: {    colorScheme: "gray",  },}
export default Container
This means that every instance of <Container /> has the baseStyle and the colorScheme of gray by default. But only creating the file doesn’t do anything yet, you’ll need to tell Chakra UI to use this file for Container now. You do this by passing overwrites for built-in components and also files for new components into the components key of the extendTheme function:
import { extendTheme, ThemeConfig } from "@chakra-ui/react"import Container from "./chakra/container"
const breakpoints = {  sm: "640px",  md: "768px",  lg: "1024px",  xl: "1280px",  "2xl": "1536px",}
const config: ThemeConfig = {  initialColorMode: "light",  useSystemColorMode: true,}
const theme = extendTheme({  components: {    Container,  },  breakpoints,  config,})
export default theme
Switch to your browser window running http://localhost:3000 now to see the visual change. The heading and paragraph has a padding around it now and the max-width is wider.
Hooray, you just modified one of Chakra UI’s built-in components! To recap, what you just learned:
- Setting up Vite and Chakra UI
- Chakra UI uses a
themefor its provider. Create a file with an export using theextendThemefunction to set new values and overwrite default ones - Component styles have a dedicated theming API and you can use
baseStyle,sizes,variants, anddefaultPropsto extend/overwrite existing components and define completely new components
Okay, ready to dive deeper into the component style API? Great! Since this is a brand new, custom component there are three things you’ll need to do:
- Create a file defining the React component
- Create a file defining the component styles
- Adding the component style to
extendTheme
After that you’ll be able to use the <MultiContainer /> component in your app.
Since MultiContainer is not a built-in component a React component that consumes the styles is needed. For this you can use the useStyleConfig and useMultiStyleConfig React hooks. Create a file at src/components/multi-container.tsx:
import * as React from "react"import { useMultiStyleConfig, Box, Container, BoxProps } from "@chakra-ui/react"
interface IMultiContainerProps extends BoxProps {  variant?: "solid" | "gradient" | "ghost" | undefined  colorScheme?: string  size?: "prose" | "1/4" | "2/4" | "3/4" | "full"}
const MultiContainer: React.FC<IMultiContainerProps> = ({  variant = undefined,  colorScheme = undefined,  size = undefined,  children,  ...rest}) => {  const styles = useMultiStyleConfig(`CustomContainer`, {    variant,    colorScheme,    size,  })
  return (    <Box __css={{ ...styles.outer }} {...rest}>      <Container sx={{ ...styles.inner }}>{children}</Container>    </Box>  )}
export default MultiContainer
I’d like to start off by defining the React component as this defines the public facing API that a user will interact with. Based off on this the creation of the component style is easier in my experience.
Detailed look at MultiContainer component
For a multipart component you can define as many parts as you want. In this case it’s outer and inner. The IMultiContainerProps TypeScript type restricts the public API that the component will have and is a good guidance for the work that still needs to be done.
By using CustomContainer in the useMultiStyleConfig hook you defined the name of the component you’ll pass to extendTheme. The hook returns the styles for each part you declared in the component style.
Essentially the MultiContainer component is a wrapper around the existing Container component so that you can create full bleed containers and different styles between the outer and inner part. The <Box /> component is a generic component provided by Chakra UI that accepts all valid props. The outer styles are passed to the prop __css. It has the same API as the sx prop, but has a lower style priority. This means you can override the style properties with Chakra style props.
You can leverage the useStyleConfig and useMultiStyleConfig React hooks to access component styles you defined and use the information in your React components however you like. When accessing the component styles the variant, colorScheme and size can be passed along.
Create a new file at src/chakra/custom-container.ts. You’ll notice that the shape of the config differs a little bit – for multipart components a new top-level parts key is needed and each part is a key inside baseStyle, sizes, variants, and defaultProps:
import { ComponentStyleConfig } from "@chakra-ui/react"
const CustomContainer: ComponentStyleConfig = {  parts: ["outer", "inner"],  baseStyle: {    outer: {},    inner: {},  },  variants: {    solid: (props) => ({      outer: {},    }),    ghost: (props) => ({      outer: {},      inner: {},    }),    gradient: (props) => ({      outer: {},    }),  },  sizes: {    prose: {      inner: {},    },    // Percentage-based widths for "inner" part  },  defaultProps: {    colorScheme: "gray",  },}
export default CustomContainerThe way I figured out the styles for multipart components and all the content below is by reading the source code of Chakra UI. In there, you can find really comprehensive examples like the Button component (opens in a new tab).
The file already contains the variants and sizes defined in the MultiContainer component. Each configuration inside a outer will go to the outer <Box />, each inner styles will go to the inner <Container />.
Let’s wire up the custom component into the app so that you can see the changes made to the component style. Edit the theme:
import { extendTheme, ThemeConfig } from "@chakra-ui/react"import Container from "./chakra/container"import CustomContainer from "./chakra/custom-container"
12 collapsed lines
const breakpoints = { sm: "640px", md: "768px", lg: "1024px", xl: "1280px", "2xl": "1536px",}
const config: ThemeConfig = { initialColorMode: "light", useSystemColorMode: true,}
const theme = extendTheme({ components: { Container, CustomContainer, }, breakpoints, config,})
export default themeEdit the src/App.tsx to showcase some different variants & sizes of the MultiContainer component:
import React from "react"import {  Container,  useColorMode,  Button,  Heading,  Text,  Divider,} from "@chakra-ui/react"import MultiContainer from "./components/multi-container"
function App() {  const { colorMode, toggleColorMode } = useColorMode()
  return (    <main>      <Button        position="fixed"        right="1rem"        top="1rem"        onClick={toggleColorMode}      >        Toggle {colorMode === "light" ? "Dark" : "Light"}      </Button>      <Container>        <Heading as="h1">Chakra UI: Advanced Multi-Part Components</Heading>        <Text sx={{ mt: 3, mb: 3 }}>          This example page showcases a custom made "Container" component that          supports light/dark mode, variants and color schemes. It's two parts          (Outer and Inner) and thus supports full bleed layouts, normal          constrained ones and different styles for both containers.        </Text>      </Container>      <Divider />      <MultiContainer>        <Heading as="h2">No Variant / No Color Scheme</Heading>        <Text sx={{ mt: 3, mb: 3 }}>          This Container has no variant set and also no color scheme. The size          is also not set.        </Text>      </MultiContainer>      <MultiContainer variant="solid">        <Heading as="h2">"Solid" Variant / Default Color Scheme</Heading>        <Text sx={{ mt: 3, mb: 3 }}>          This Container has the "solid" variant set and also uses the default          color scheme "gray". The size is not set.        </Text>      </MultiContainer>      <MultiContainer variant="solid" colorScheme="purple">        <Heading as="h2">"Solid" Variant / "Purple" Color Scheme</Heading>        <Text sx={{ mt: 3, mb: 3 }}>          This Container has the "solid" variant set and also uses the "purple"          color scheme. The size is not set.        </Text>      </MultiContainer>      <MultiContainer variant="ghost" colorScheme="blue">        <Heading as="h2">"Ghost" Variant / "Blue" Color Scheme</Heading>        <Text sx={{ mt: 3, mb: 3 }}>          This Container has the "ghost" variant set and also uses the "blue"          color scheme. The size is not set.        </Text>      </MultiContainer>      <MultiContainer variant="gradient" colorScheme="orange">        <Heading as="h2">"Gradient" Variant / "Orange" Color Scheme</Heading>        <Text sx={{ mt: 3, mb: 3 }}>          This Container has the "gradient" variant set and also uses the          "Orange" color scheme. The size is not set.        </Text>      </MultiContainer>      <MultiContainer size="prose">        <Heading as="h2">No Variant / No Color Scheme / "Prose" Size</Heading>        <Text sx={{ mt: 3, mb: 3 }}>          This Container has no variant set and also no color scheme. The size          is set to "prose".        </Text>      </MultiContainer>      <MultiContainer variant="ghost" size="3/4">        <Heading as="h2">          "Ghost" Variant / No Color Scheme / "3/4" Size        </Heading>        <Text sx={{ mt: 3, mb: 3 }}>          This Container has the "ghost" variant set and also no color scheme.          The size is set to "3/4" which equals 75%.        </Text>      </MultiContainer>    </main>  )}
export default App
When going back to http://localhost:3000 you should see new entries but they don’t look different right now:
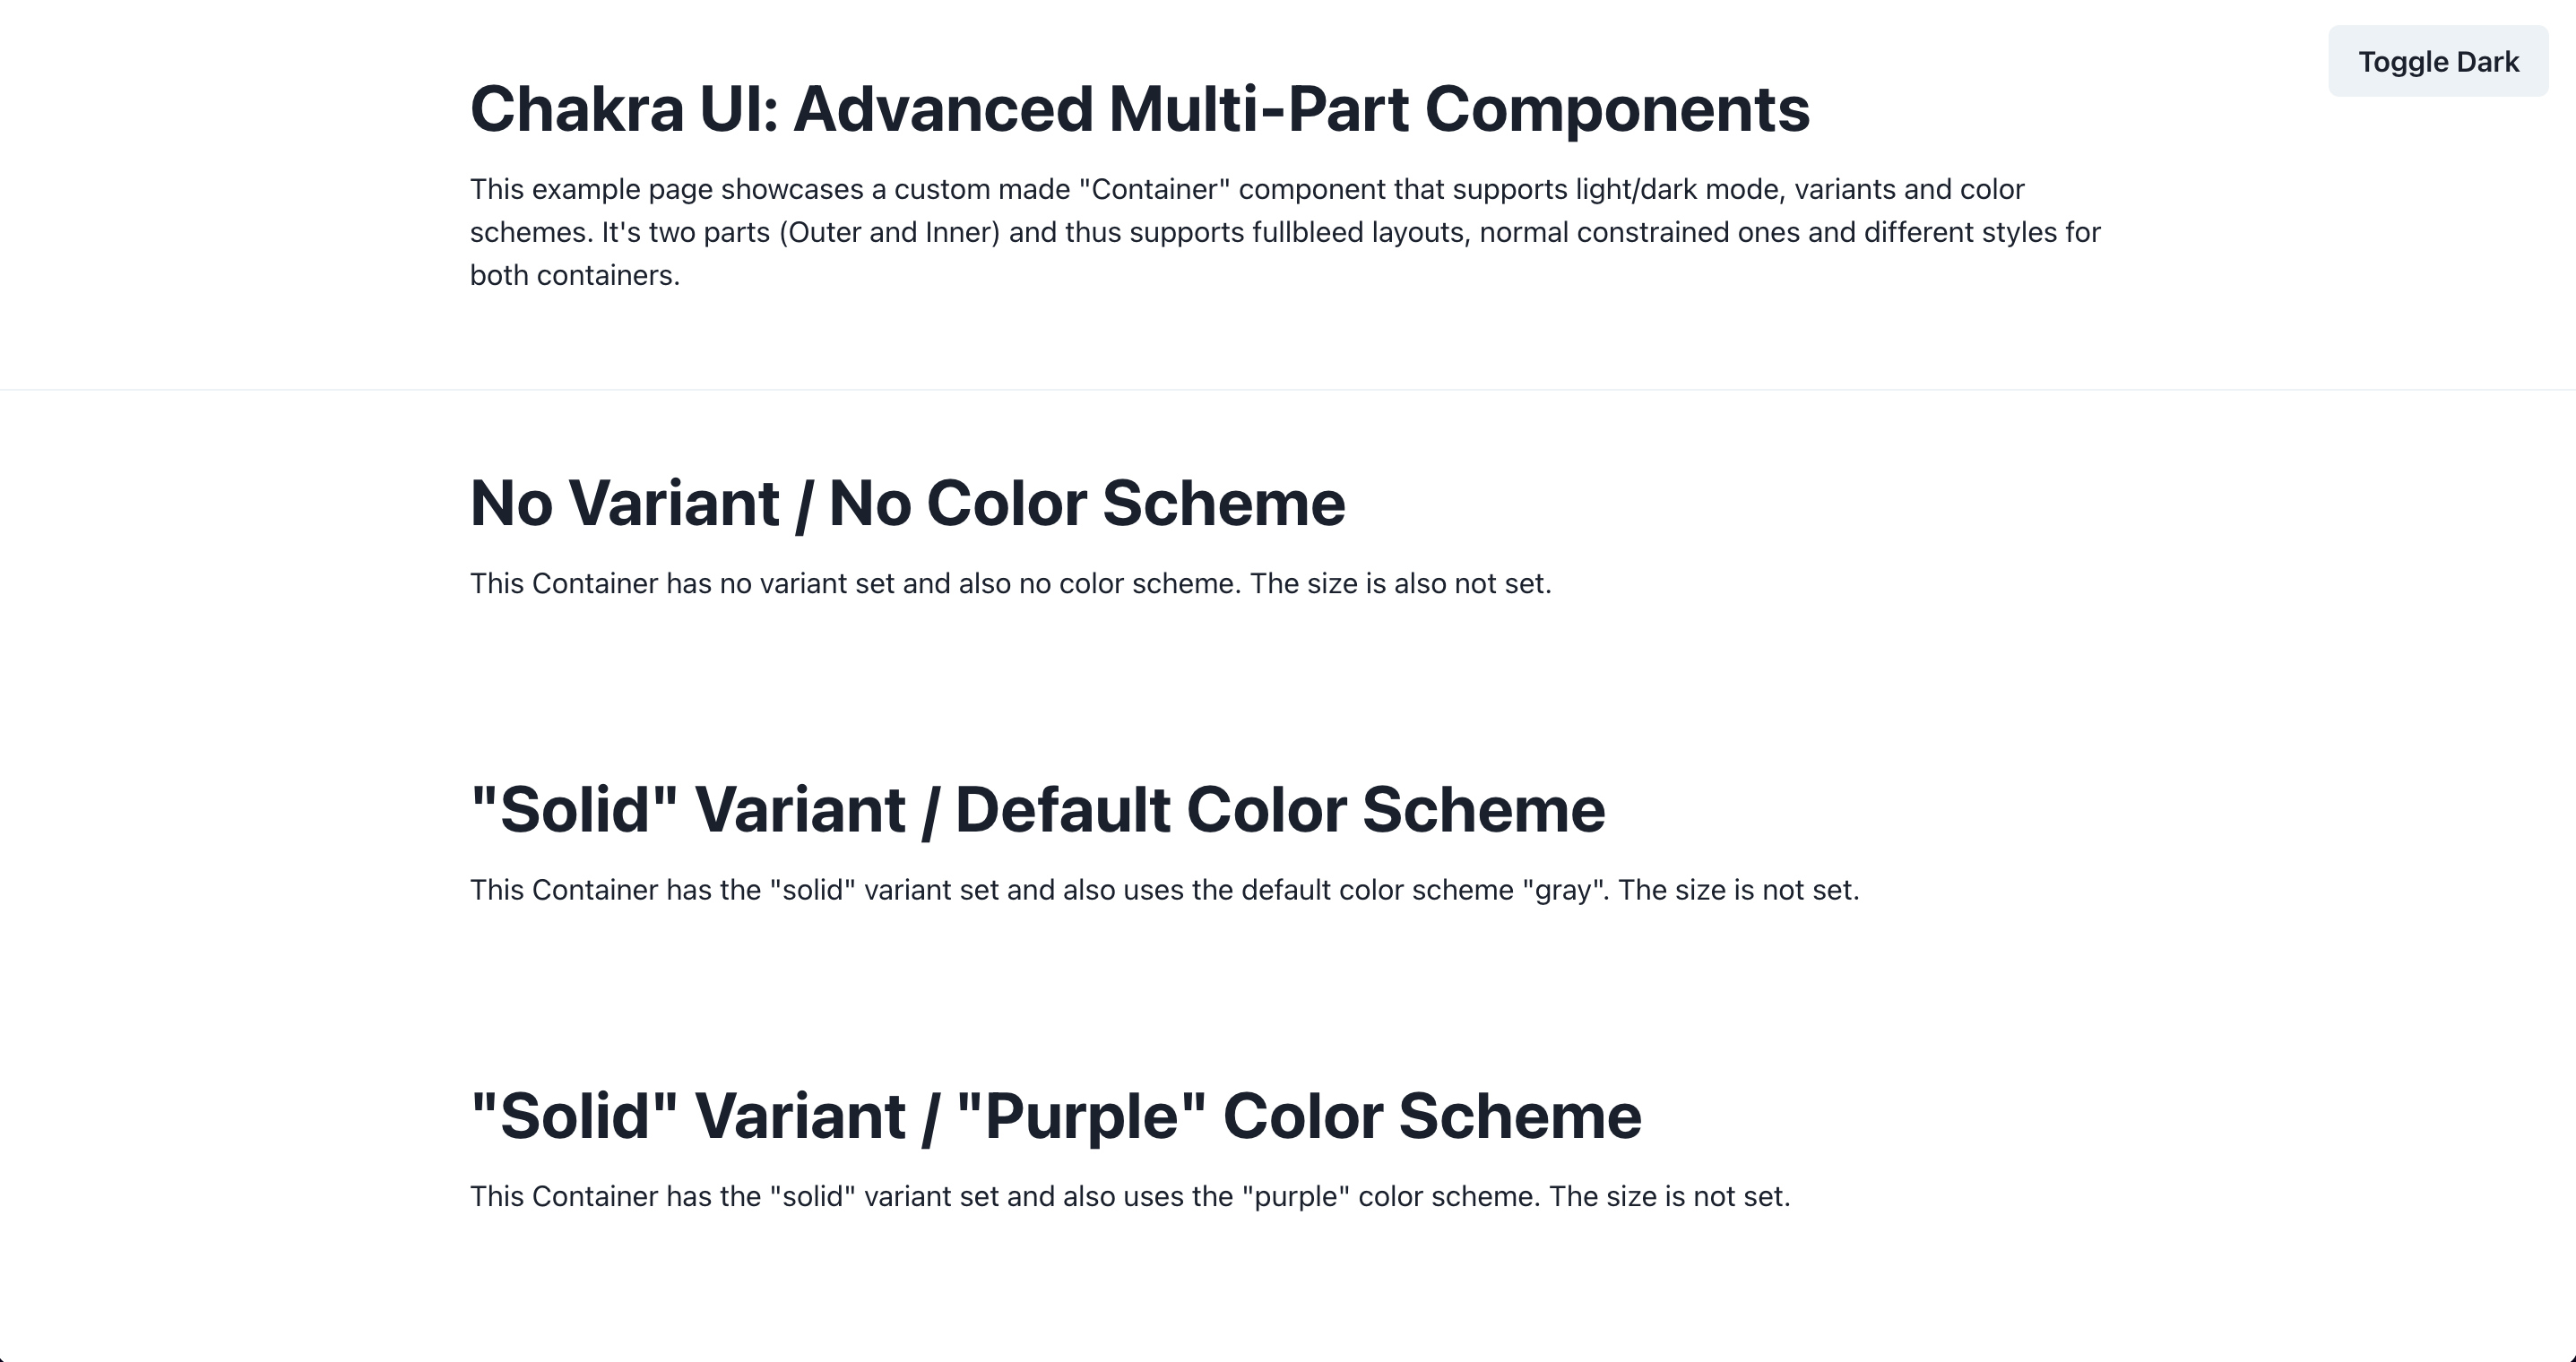
Time to change that!
Edit the component style to lay out some baseline config:
import { ComponentStyleConfig } from "@chakra-ui/react"import InnerContainerStyles from "./container"import { percentageWidths } from "./utils"
const CustomContainer: ComponentStyleConfig = {  parts: ["outer", "inner"],  baseStyle: {    outer: {      w: "100%",      margin: 0,    },    inner: {      ...InnerContainerStyles.baseStyle,    },  },  variants: {    solid: (props) => ({      outer: {},    }),    ghost: (props) => ({      outer: {        py: [8, 10],      },      inner: {},    }),    gradient: (props) => ({      outer: {},    }),  },  sizes: {    prose: {      inner: {        maxW: "65ch",      },    },    ...percentageWidths(4, "inner"),  },  defaultProps: {    colorScheme: "gray",  },}
export default CustomContainer
The percentageWidths function inside utils.ts doesn’t exist yet. Create a new file at src/chakra/utils.ts:
export function percentageWidths( divisions: number, part: string, property = "maxW") { let result: Record<typeof part, any> = {} for (let i = 1; i <= divisions; i++) { const name = i === divisions ? "full" : `${i}/${divisions}` const w = Number((i / divisions) * 100).toFixed(4) result[name] = { [part]: { [property]: `${+w}%`, }, } } return result}Detailed look at percentageWidths
The function can take three arguments: divisions, part, and property. In the component style it’s used with 4 and "inner" (so for property it falls back to maxW). At the end an object is returned that can be spread into the component style.
The for-loop is 1-indexed (and not zero-indexed as usual) so that for 4 divisions the name starts with "1/4". For the case "4/4" the name full should be used instead. w is calculated by first dividing i with divisions and then multiplying it by 100 to make it a percentage. Using Number() you’re casting it to a number so that you can round the value with .toFixed(4). In line 10 the empty result object is directly mutated for each iteration in the for-loop. Only when the for-loop is finished the now filled result object is returned.
The goal of the function is to return an object in the following shape. It’s then spread into the sizes component style. This allows the usage of e.g. size="1/4" on the React component.
{ "1/2": { "inner": { "maxW": "50%" } }, "full": { "inner": { "maxW": "100%" } }}If you now go back to http://localhost:3000 and look at the bottom two entries you’ll see that their max-width changed. Awesome!
Now we’re getting to the most exciting part of this tutorial! It’ll be more complicated than the previous sections but don’t worry, you got this 👍🏻
The variants option of a component is really the most powerful one as you can do so much with the information you get: theme, color schemes, and color modes.
Let’s start with the solid variant. Goal of it is to make both outer and inner a solid color by using the colors in Chakra UI’s default theme.
Edit the utils.ts file:
import { mode, transparentize, getColor, StyleFunctionProps,} from "@chakra-ui/theme-tools"
17 collapsed lines
export function percentageWidths( divisions: number, part: string, property = "maxW") { let result: Record<typeof part, any> = {} for (let i = 1; i <= divisions; i++) { const name = i === divisions ? "full" : `${i}/${divisions}` const w = Number((i / divisions) * 100).toFixed(4) result[name] = { [part]: { [property]: `${+w}%`, }, } } return result}
type AccessibleColor = { bg?: string color?: string}
/** Accessible color overrides for less accessible colors. */export const accessibleColorMap: { [key: string]: AccessibleColor } = { yellow: { bg: "yellow.400", color: "black", }, cyan: { bg: "cyan.400", color: "black", },}
export function variantSolid(props: StyleFunctionProps) { const { colorScheme: c } = props
if (!c) { return {} }
if (c === "gray") { return { bg: mode(`gray.100`, `whiteAlpha.200`)(props), } }
const { bg = `${c}.500`, color = "white" } = accessibleColorMap[c] || {}
return { bg: mode(bg, `${c}.200`)(props), color: mode(color, `gray.800`)(props), }}Detailed look at variantSolid
Inside each modifier style you can use an object to define the style or a function that returns an object. Throughout the component style for CustomContainer the function syntax was used as this allows access to props. This way you can get this information:
colorSchemecolorModeorientationtheme
Which is excellent to create a reusable function that can consider all of the above. So props from solid: (props) => () goes into variantSolid. As gray was defined as the default colorScheme no early return will happen.
The mode('light-mode value', 'dark-mode value')(props) function is a helper from Chakra UI and allows one to access the theme in dot notation and setting the value depending on the current color mode (light or dark mode).
This line is also interesting:
const { bg = `${c}.500`, color = "white" } = accessibleColorMap[c] || {}If the colorScheme is yellow or cyan the values from accessibleColorMap should be used. Otherwise use ${c}.500 for the bg and white for color. This ensures good contrast for text on otherwise too light background.
With this new function, edit the component style:
import { ComponentStyleConfig } from "@chakra-ui/react"import InnerContainerStyles from "./container"import { percentageWidths, variantSolid } from "./utils"
11 collapsed lines
const CustomContainer: ComponentStyleConfig = { parts: ["outer", "inner"], baseStyle: { outer: { w: "100%", margin: 0, }, inner: { ...InnerContainerStyles.baseStyle, }, }, variants: { solid: (props) => ({ outer: variantSolid(props), }),24 collapsed lines
ghost: (props) => ({ outer: { py: [8, 10], }, inner: {}, }), gradient: (props) => ({ outer: {}, }), }, sizes: { prose: { inner: { maxW: "65ch", }, }, ...percentageWidths(4, "inner"), }, defaultProps: { colorScheme: "gray", },}
export default CustomContainerCheck http://localhost:3000 to see the second and third section working 🎉
Next up is the ghost variant. With this the outer part has a solid color, the inner part has a slightly transparent, lighter color. So you’ll be able to clearly see the borders of the inner part.
Edit the utils.ts file:
62 collapsed lines
import { mode, transparentize, getColor, StyleFunctionProps,} from "@chakra-ui/theme-tools"
export function percentageWidths( divisions: number, part: string, property = "maxW") { let result: Record<typeof part, any> = {} for (let i = 1; i <= divisions; i++) { const name = i === divisions ? "full" : `${i}/${divisions}` const w = Number((i / divisions) * 100).toFixed(4) result[name] = { [part]: { [property]: `${+w}%`, }, } } return result}
type AccessibleColor = { bg?: string color?: string}
/** Accessible color overrides for less accessible colors. */export const accessibleColorMap: { [key: string]: AccessibleColor } = { yellow: { bg: "yellow.400", color: "black", }, cyan: { bg: "cyan.400", color: "black", },}
export function variantSolid(props: StyleFunctionProps) { const { colorScheme: c } = props
if (!c) { return {} }
if (c === "gray") { return { bg: mode(`gray.100`, `whiteAlpha.200`)(props), } }
const { bg = `${c}.500`, color = "white" } = accessibleColorMap[c] || {}
return { bg: mode(bg, `${c}.200`)(props), color: mode(color, `gray.800`)(props), }}
export function variantGhost(props: StyleFunctionProps) { const { colorScheme: c, theme } = props
if (c === "gray") { return { color: mode(`inherit`, `whiteAlpha.900`)(props), bg: mode(`gray.100`, `whiteAlpha.200`)(props), } }
const transparentBgDark = transparentize(`${c}.200`, 0.12)(theme) const transparentBgLight = transparentize(`${c}.50`, 0.8)(theme)
return { color: mode(`${c}.600`, `${c}.100`)(props), bg: mode(transparentBgLight, transparentBgDark)(props), }}
export function variantGhostOuter(props: StyleFunctionProps) { const { colorScheme: c } = props
if (c === "gray") { return { color: mode(`inherit`, `whiteAlpha.900`)(props), bg: mode(`gray.50`, `whiteAlpha.200`)(props), } }
return { color: mode(`${c}.600`, `${c}.200`)(props), bg: mode(`${c}.200`, `${c}.900`)(props), }}The functionality is split up into two functions as the inner part needs some transparency for the background. For this the transparentize('color-string', alpha)(theme) helper function from Chakra UI is used. Since gray is a special case, an early return with different values is given. Otherwise these functions are quite similar to the variantSolid function.
To add the new functionality, edit your component style:
import { ComponentStyleConfig } from "@chakra-ui/react"import InnerContainerStyles from "./container"import { variantSolid, variantGhost, variantGhostOuter, percentageWidths,} from "./utils"
15 collapsed lines
const CustomContainer: ComponentStyleConfig = { parts: ["outer", "inner"], baseStyle: { outer: { w: "100%", margin: 0, }, inner: { ...InnerContainerStyles.baseStyle, }, }, variants: { solid: (props) => ({ outer: variantSolid(props), }), ghost: (props) => ({ outer: { ...variantGhostOuter(props), py: [8, 10], }, inner: variantGhost(props), }),18 collapsed lines
gradient: (props) => ({ outer: {}, }), }, sizes: { prose: { inner: { maxW: "65ch", }, }, ...percentageWidths(4, "inner"), }, defaultProps: { colorScheme: "gray", },}
export default CustomContainerAnd last, but not least: The gradient variant. This one is a bit trickier since the mode() helper function unfortunately can’t really help here and you’ll need to write a bit more verbose code:
Edit the utils.ts file:
97 collapsed lines
import { mode, transparentize, getColor, StyleFunctionProps,} from "@chakra-ui/theme-tools"
export function percentageWidths( divisions: number, part: string, property = "maxW") { let result: Record<typeof part, any> = {} for (let i = 1; i <= divisions; i++) { const name = i === divisions ? "full" : `${i}/${divisions}` const w = Number((i / divisions) * 100).toFixed(4) result[name] = { [part]: { [property]: `${+w}%`, }, } } return result}
type AccessibleColor = { bg?: string color?: string}
/** Accessible color overrides for less accessible colors. */export const accessibleColorMap: { [key: string]: AccessibleColor } = { yellow: { bg: "yellow.400", color: "black", }, cyan: { bg: "cyan.400", color: "black", },}
export function variantSolid(props: StyleFunctionProps) { const { colorScheme: c } = props
if (!c) { return {} }
if (c === "gray") { return { bg: mode(`gray.100`, `whiteAlpha.200`)(props), } }
const { bg = `${c}.500`, color = "white" } = accessibleColorMap[c] || {}
return { bg: mode(bg, `${c}.200`)(props), color: mode(color, `gray.800`)(props), }}
export function variantGhost(props: StyleFunctionProps) { const { colorScheme: c, theme } = props
if (c === "gray") { return { color: mode(`inherit`, `whiteAlpha.900`)(props), bg: mode(`gray.100`, `whiteAlpha.200`)(props), } }
const transparentBgDark = transparentize(`${c}.200`, 0.12)(theme) const transparentBgLight = transparentize(`${c}.50`, 0.8)(theme)
return { color: mode(`${c}.600`, `${c}.100`)(props), bg: mode(transparentBgLight, transparentBgDark)(props), }}
export function variantGhostOuter(props: StyleFunctionProps) { const { colorScheme: c } = props
if (c === "gray") { return { color: mode(`inherit`, `whiteAlpha.900`)(props), bg: mode(`gray.50`, `whiteAlpha.200`)(props), } }
return { color: mode(`${c}.600`, `${c}.200`)(props), bg: mode(`${c}.200`, `${c}.900`)(props), }}
export function variantGradient(props: StyleFunctionProps) { const { colorScheme: c, colorMode, theme } = props const isDarkMode = colorMode === "dark"
if (!c) { return {} }
if (c === "gray") { const topColor = isDarkMode ? getColor(theme, `${c}.700`) : getColor(theme, `${c}.100`) const bottomColor = isDarkMode ? getColor(theme, `${c}.900`) : getColor(theme, `${c}.300`)
return { bg: `linear-gradient(0deg, ${bottomColor} 0%, ${topColor} 100%)`, } }
const topColor = isDarkMode ? getColor(theme, `${c}.700`) : getColor(theme, `${c}.100`) const bottomColor = isDarkMode ? getColor(theme, `${c}.900`) : getColor(theme, `${c}.300`)
return { bg: `linear-gradient(0deg, ${bottomColor} 0%, ${topColor} 100%)`, }}The major difference between variantGradient and the rest is that instead of relying on mode() to use the current colorMode to decide the color, for gradients you’ll need to write this ternary yourself every time. With the getColor(theme, 'color-string') helper function you can get the actual value out of the theme using the dot notation (instead of directly reaching into theme).
Maybe some day Chakra UI will add some convenience methods around gradients (with support for colorMode). Anyways, edit the final variant:
import { ComponentStyleConfig } from "@chakra-ui/react"import InnerContainerStyles from "./container"import { variantSolid, variantGhost, variantGhostOuter, percentageWidths, variantGradient,} from "./utils"
22 collapsed lines
const CustomContainer: ComponentStyleConfig = { parts: ["outer", "inner"], baseStyle: { outer: { w: "100%", margin: 0, }, inner: { ...InnerContainerStyles.baseStyle, }, }, variants: { solid: (props) => ({ outer: variantSolid(props), }), ghost: (props) => ({ outer: { ...variantGhostOuter(props), py: [8, 10], }, inner: variantGhost(props), }), gradient: (props) => ({ outer: variantGradient(props), }),15 collapsed lines
}, sizes: { prose: { inner: { maxW: "65ch", }, }, ...percentageWidths(4, "inner"), }, defaultProps: { colorScheme: "gray", },}
export default CustomContainerAnd you’re done with all options for MultiContainer 🎉 You now have a fully functional multipart Chakra UI component that takes the current color mode into account and can be controlled by size and color scheme.
When defining modifier styles for a component you can not only write it as an object but also as a function (props) => ({}) which gives you full access to values like colorMode or theme. You’ve then written utility functions to generate the styles for three variants: solid, ghost, and gradient. Using helper functions from @chakra-ui/theme-tools you created accessible variants leveraging the color mode and respecting the current color mode.
Congrats on finishing the tutorial, you can find the code for the finished project on GitHub (opens in a new tab). But what now? Where could you go next?
In this tutorial you created a multipart component consisting of two parts that interact rather simple with each other. I wanted to focus on the techniques and code to integrate all possible options into the variants. Think of a component like a menu that consists of more than two parts and create a multipart component out of it. It’ll help if you read the source code (opens in a new tab) on such components.
You could also try to publish your component as its own npm package (see official documentation (opens in a new tab)) or add theme typings (opens in a new tab).